How Can You Recover Data from a Specific Folder?
On a Windows computer, you can classify your files and put them into designated folders according to your requirements. Files in the folders should be important for you and you must want to keep them safe. However, data loss issues always happen unexpectedly. You may delete your files from a folder by mistake. Or you may lose your files due to virus attack, power outage, system crash, or some other reasons.
Questions come:
- How to recover files from a folder?
- How to recover deleted files from a specific folder?
Here are different data recovery methods for different situations:
- If your files are not permanently deleted, you can directly restore them from Recycle Bin.
- If unfortunately, you have permanently deleted your files or you have emptied Recycle Bin, you can use professional data recovery software to recover data from a specific folder.
- If you have backed up these files before, you can also choose to restore these files from the backup.
Way 1: Restore Deleted Files from Recycle Bin
Recycle Bin is a location to save the files that are not permanently deleted from your Windows computer. Files in Recycle Bin are still recoverable. This gives you a chance to regret: if you delete some files unexpectedly, you can go to Recycle Bin to restore them to their original locations.
Here is how to restore files from Recycle Bin:
Step 1: Open Recycle Bin from the desktop.
Step 2: Find the files you want to recover, then select them. You can select one file, then press the Ctrl key on the keyboard and select multiple files at the same time. If there are too many files in Recycle Bin, you can click the search box at the top-right corner and search for your needed files by name.
Step 3: Right-click the selected files and select Restore. The selected files will be restored to the original location. That is, you can go to the original folder(s) to find the restored files.
If you can’t find your needed files in Recycle Bin, it usually means that they are permanently deleted. If so, you can’t restore them from Recycle Bin. You will need to use a data restore tool to get them back.
Way 2: Recover Data from a Specific Folder Using Data Recovery Software
MiniTool Power Data Recovery is the best data recovery software that allows you to recover deleted files from a specific folder.
This software can recover all kinds of files like images, videos, documents, and more from different storage devices like internal hard drives, external hard drives, SSDs, SD cards, memory cards, pen drives, etc. You can run it on all versions of Windows, including Windows 11, Windows 10, Windows 8/8.1, Windows 7, etc.
With it, you can directly recover your lost and deleted files from a specific location like a specific folder, Recycle Bin, and the desktop.
To experience this feature, you can try MiniTool Power Data Recovery Free Edition. This freeware allows you to recover 1GB of files without paying any cent. To guarantee the safety of your computer, you’d better get the genuine software from MiniTool official site.
To recover deleted files from a specific folder using this MiniTool data recovery software, you can use these steps:
Step 1: Download and install this tool on your Windows computer. Then, launch it to enter its main interface.
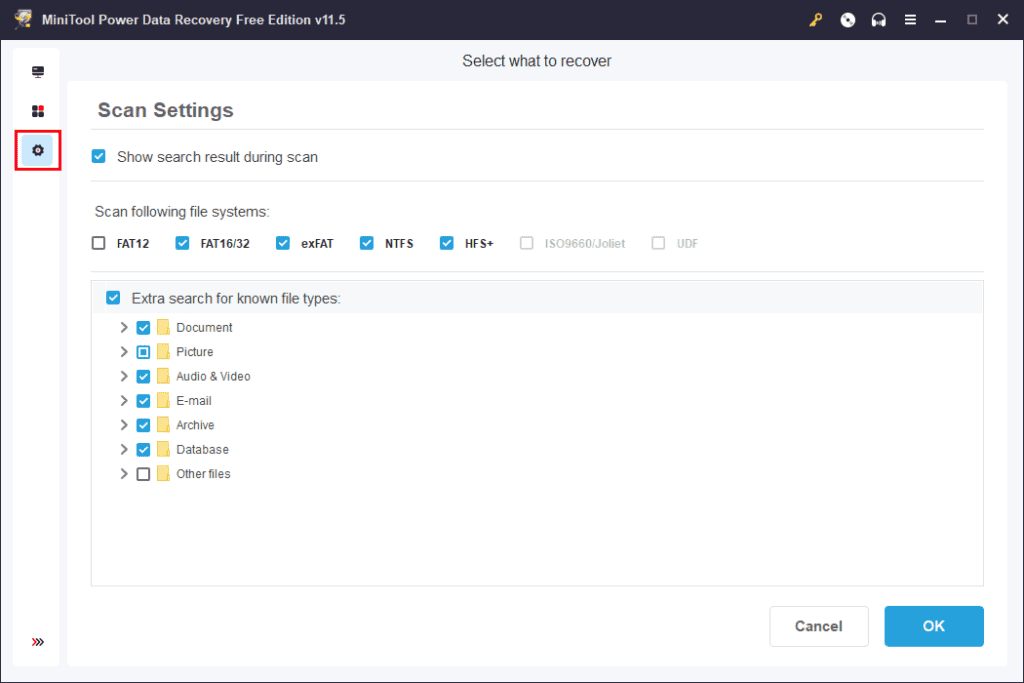
Step 2: If you want to recover some certain types of files, you can click the gear icon from the right menu panel, then only select your needed file’s types from the Scan Settings page, then click OK to save your selections and go back to the main interface.
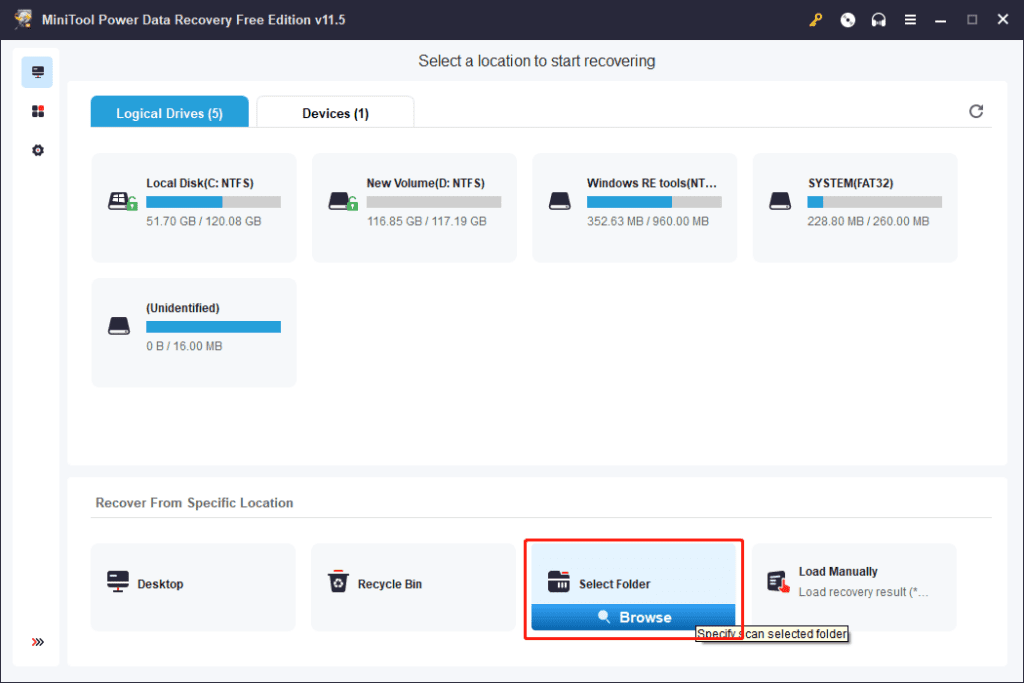
Step 3: Move your mouse cursor to Select Folder under Recover From Specific Location, next click the Browse button to continue.
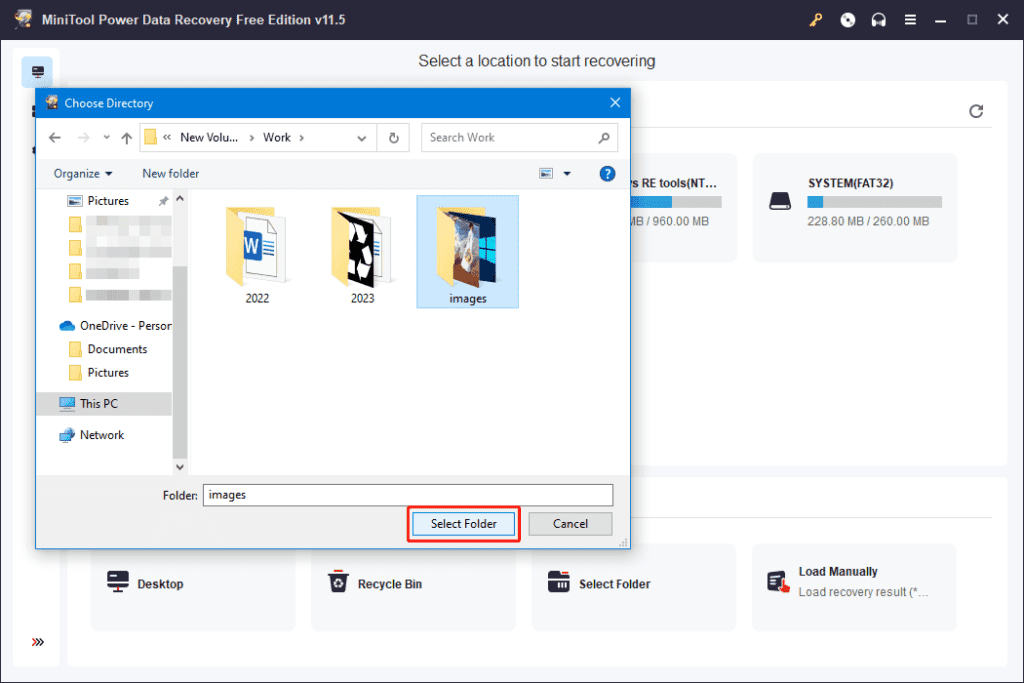
Step 4: An interface will pop up, allowing to select the folder you want to recover data from. Find and location the target folder, then click the Select Folder button to start scanning that folder.
The whole scanning process will last for some minutes. Although you can see the scan results while scanning, you’d better wait patiently until the entire scanning ends to get the best data recovery effect.
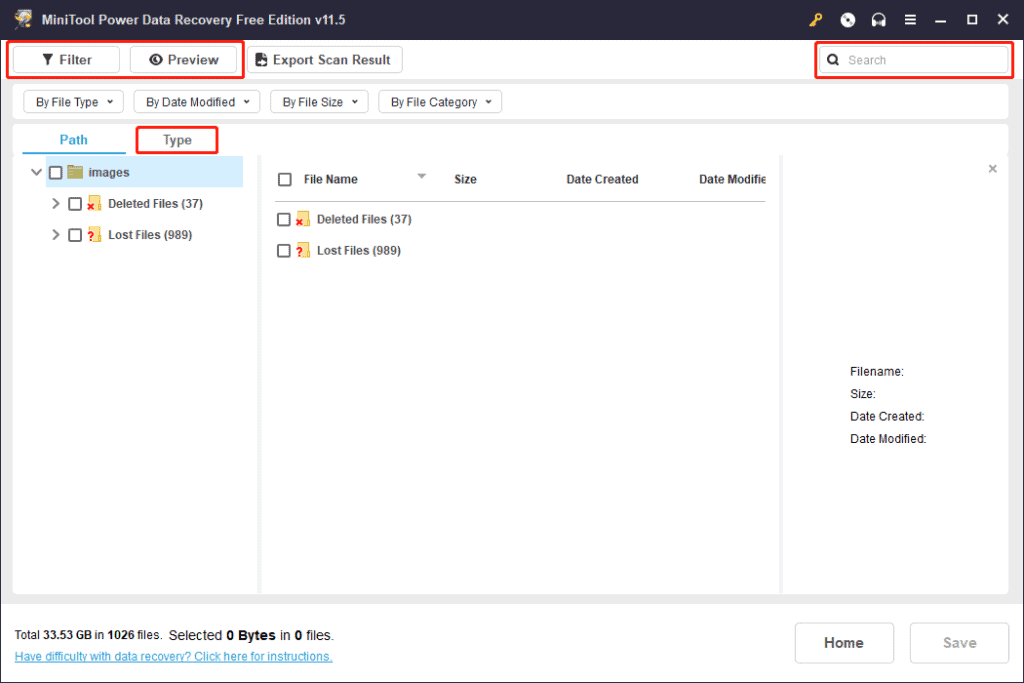
Step 5: When the scanning process completely ends, you can see the scan results that are listed by path by default. You can open each path and find the files you want to recover.
Besides, you can also use some other useful features to easily and quickly find your needed files. For example:
- You can use the Type feature to make this software show the scanned files by type, then you can find your files from a specific type folder.
- You can also use the Filter feature to filter your files by file type, data modified, file size, and file category.
- You can use the Preview feature to preview 70 types of files. This can help you check if the selected file is the file you want to recover.
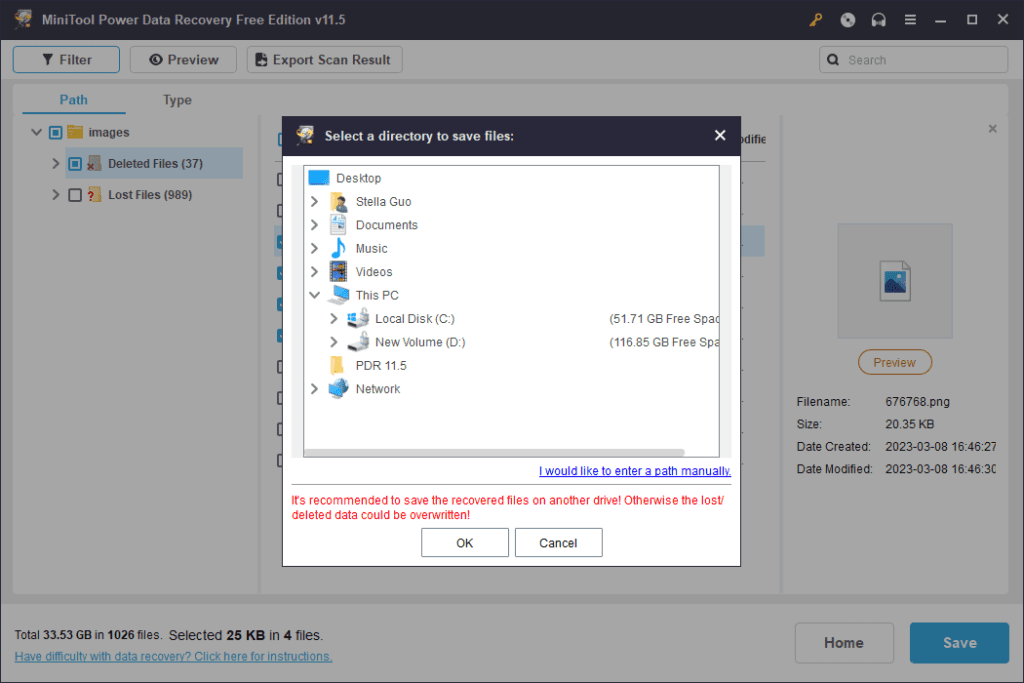
Step 6: Select the files you want to recover. You are allowed to select multiple files from different paths. Then, you need to click the Save button and choose a suitable location to save your selected files. To prevent your deleted files from being overwritten, the destination location should not be the original folders of the selected files.
After these steps, you can access the destination folder to check the recovered files. When you are sure every file you need is recovered, you can transfer these files to your needed folders.
Way 3: Restore Your Files from Backup
If you have backed up your PC, you should not forget your backup files when you want to recover data from a specific folder. You can independently use the corresponding data recovery method according to the backup software or backup service you use to restore your deleted data from a specific folder.
Bottom Line
If you want to recover your deleted files from a specific folder on Windows, you can select a suitable method from this post based on your situation. There should be an available method for you.