If you want to enjoy more of Roku’s streaming functionalities, such as live tv pause and rewind, then you need to learn How to add USB storage to a Roku tv. This way, you can rewind and pause a live telecast show in between if you missed parts.
To access this feature, you will need to add USB storage to a Roku tv using the steps discussed in this article.
Things You Need Before You Add Storage and Live Tv Pause to Your Roku Smart Tv
If you want to add USB storage and pause live television feature to your Roku tv, these are the following things you need.
1. Roku smart tv
Here, It means a Tv with a Roku app. Almost all Roku tv models support the function of connecting a USB drive. Even if you have already purchased a TCL Roku TV, all models of this TV contain USB ports. They can contain more than one USB slot. One slot is enough at once. You can purchase any model of TCL Roku tv.
2. A USB flash drive ( 2.0-compatible of size 16GB or more)
To add a live television feature, you need a 16 GB USB drive that can provide the required space. Otherwise, you won’t be able to enjoy this feature. A USB drive with less than 16 GB storage space is no use. If you have one of less size, purchase a new flash drive.
You can activate the live TV pause feature for only 90 minutes. If you think that purchasing a USB drive of more than 16 GB will increase the time to more than 90 minutes, you will waste your money. There’s no use in buying a bigger flash drive.
Before inserting your Drive into a USB port, take a backup or save all the necessary files stored inside of it. You’ll lose all previously stored files if you don’t do it. While enabling The rewind Live tv and pause feature, your USB drive undergoes complete formatting. That means all your files get deleted. The Roku software needs all the storage space.
3. Roku TV remote control
A remote comes with all Roku TVs. If you don’t have a Roku remote, Ensure to possess a connected Roku smartphone app before implementing the steps to add the USB storage.
4. Live TV input ( cable or antenna)
The other limitation is that the live tv pause function is present only on the live TV input, restricting you to anything arriving over your cable connection or antenna. Check for live tv input in your Roku tv.
How to Add USB Storage to a Roku Tv: Step-by-step Guide
Follow the steps in the exact sequence as described below.
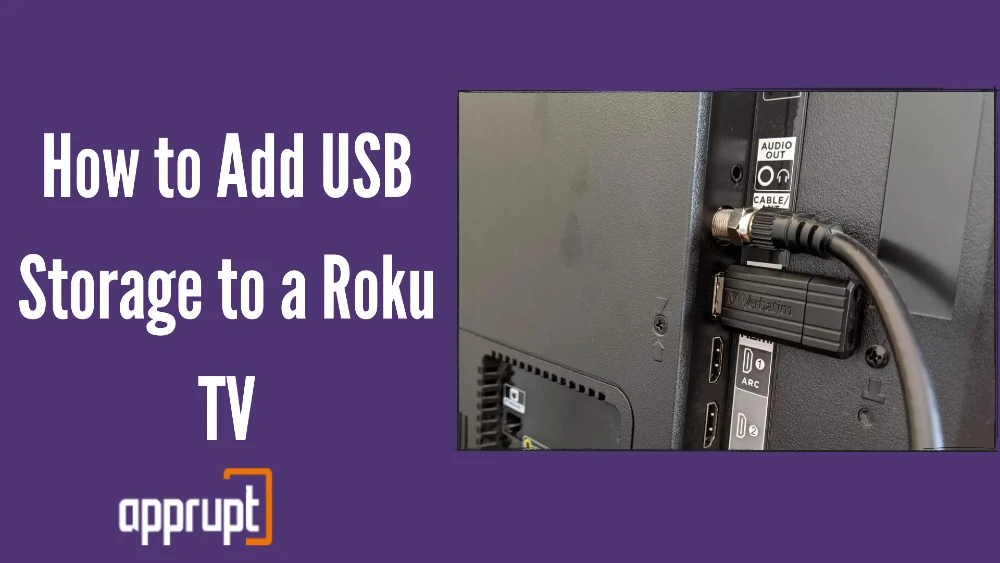
1. Find a USB port in your Roku tv.
Mainly the USB ports are located on the sides or back of all smart Roku TVs. Locate yours. You may find more than one slot to insert your USB drive. You can plug in any port. Ensure that at a time, no extra USB drives should be connected to your Tv during the set-up process.
2. Plug your Drive into the USB slot.
This step is easy to implement.
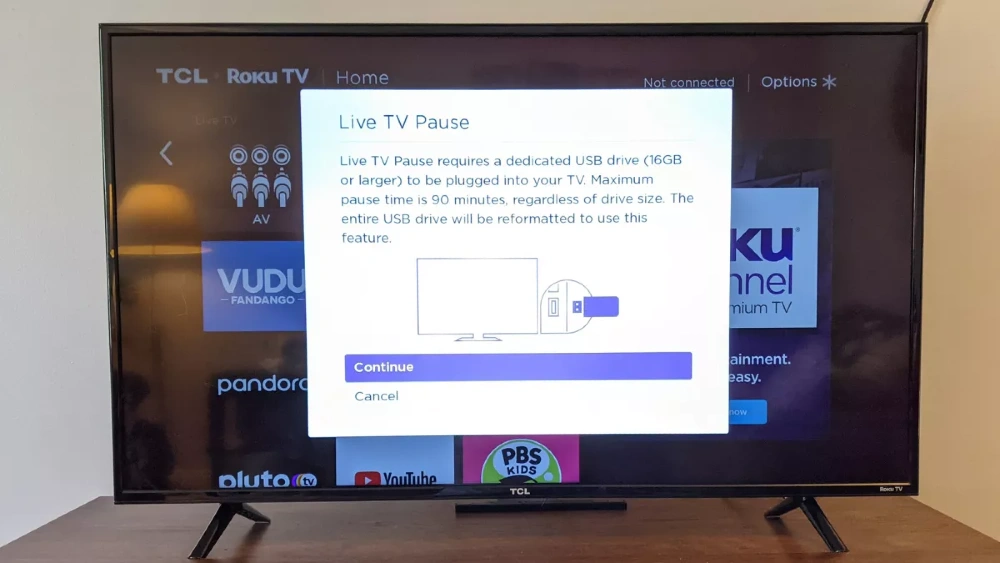
3. Activate and Setup the Live TV Pause function
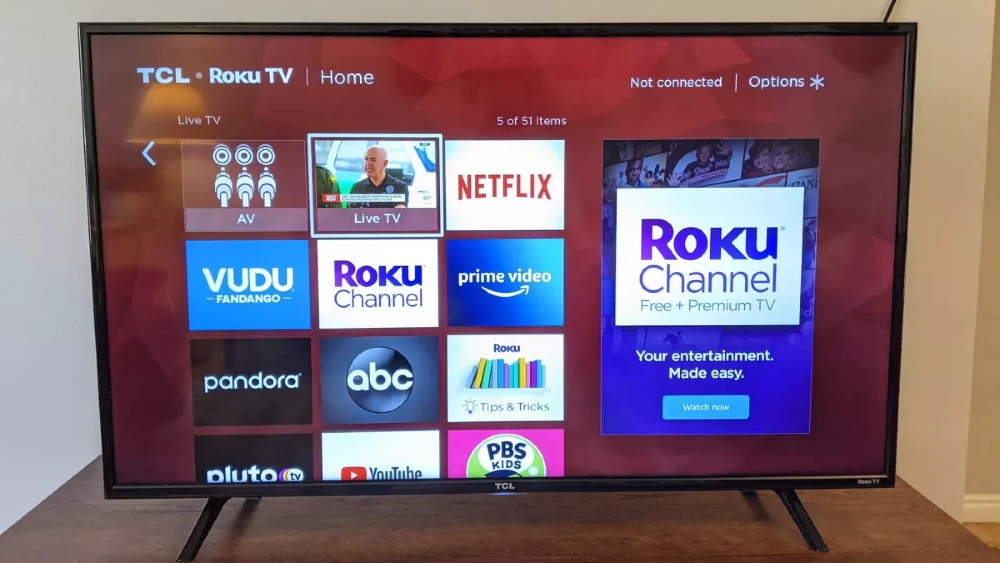
Next time, you must highlight the Live tv input option on your Roku home screen. To do that, move your cursor till this option is highlighted on the screen. A tile will appear on your home screen.
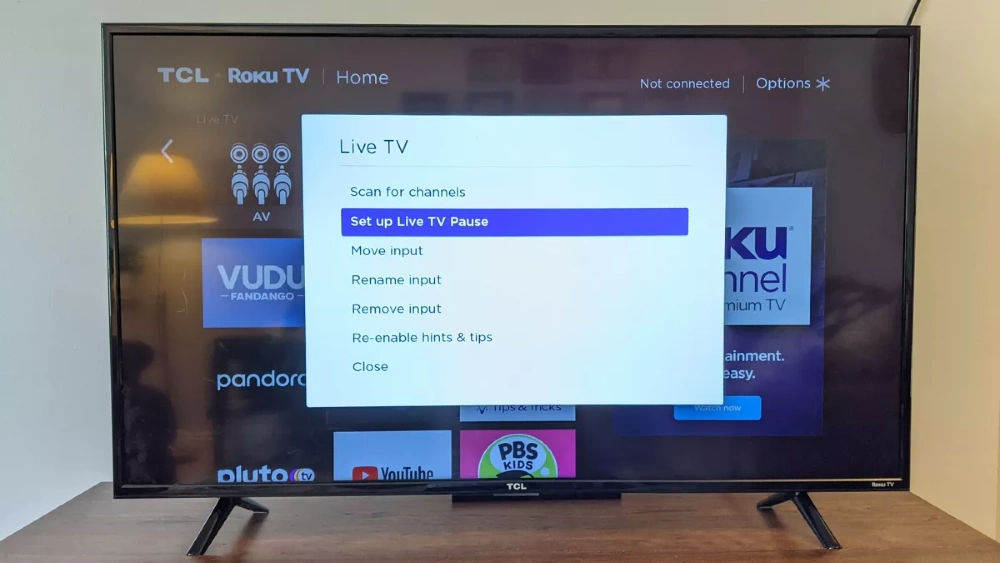
Now, you don’t have to select the “Live tv” option. Instead of that, press the star button from the Roku remote to access the options menu of your Tv.
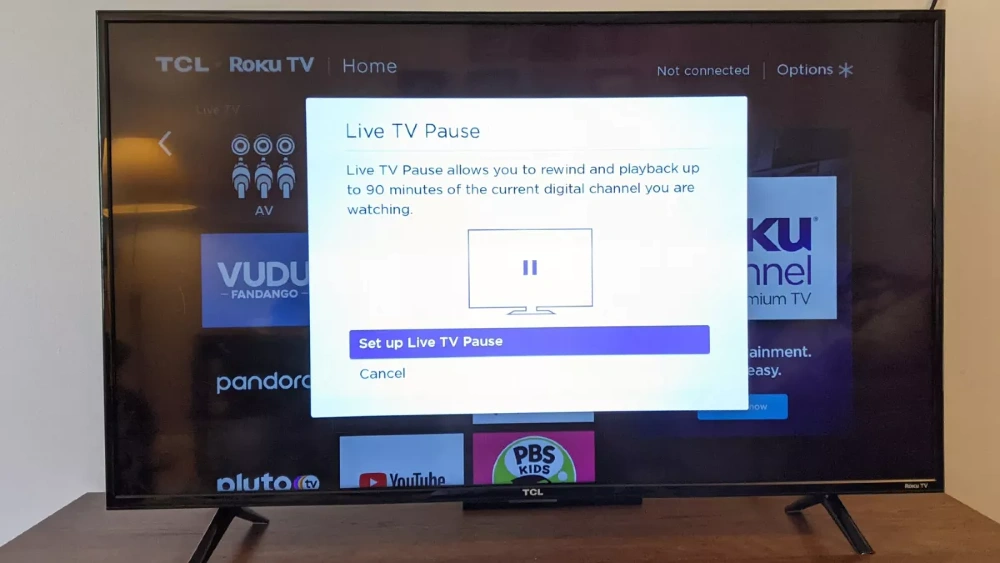
Select the “Set up Live TV Pause” option to initiate the set-up process. Complete the on-screen instructions to finish the set-up.
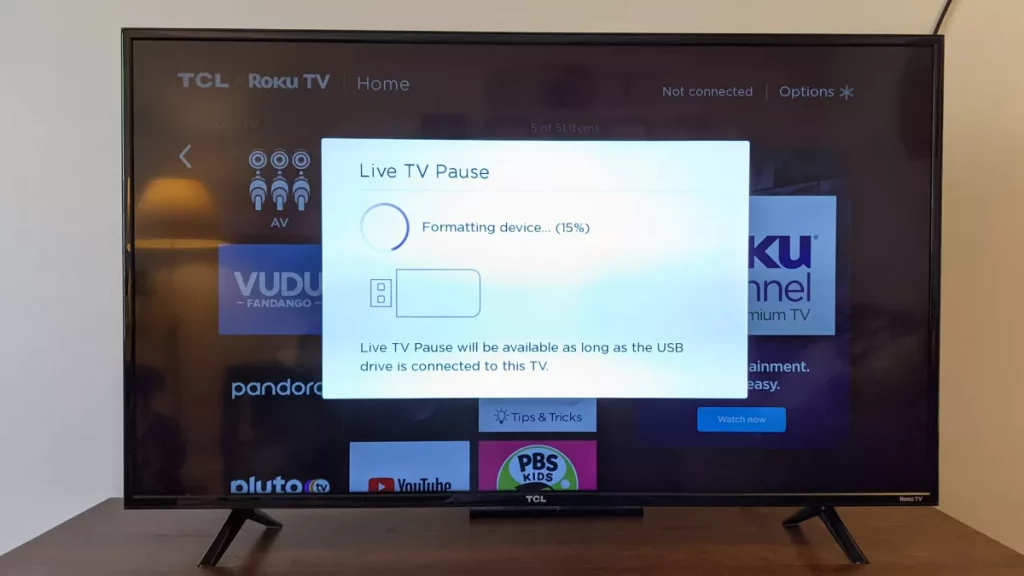
4. Reformatting of the attached USB Drive.
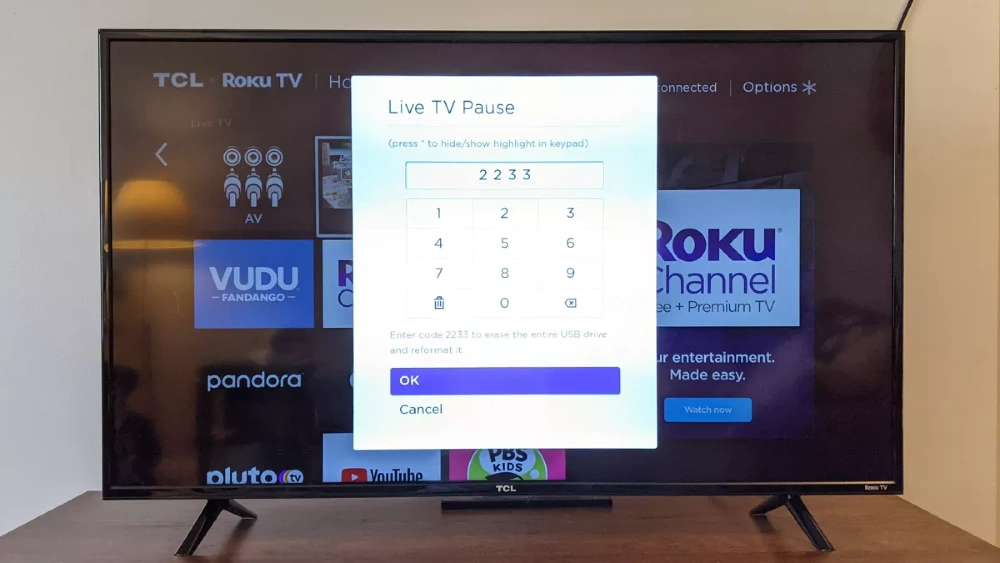
Before initiating the reformatting process, the Roku tv wants to confirm from your side. That’s why it asks to enter a Pin or confirmation code. Many people consider this as a measure of security checks.
But, it is done to prevent you from accidentally losing all your important files present in the Drive.
When your flash drive is ready for reformatting, You can find the confirmation code on the on-screen prompt below the keypad.
By using your Roku remote control’s directional pad, enter the code to begin reformatting. Click on “ok.” Once the process is complete, you can access the live tv pause premium functionality.
5. Know more about live TV pause
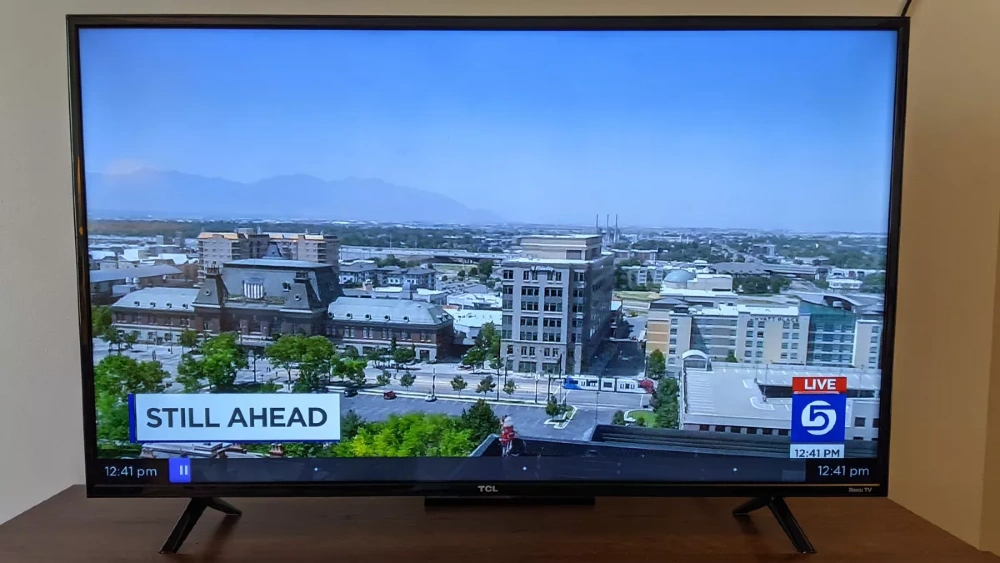
Once this feature is enabled, use the play/pause button from your Remote to play and pause the live shows on your Tv. When paused, you can rewind and fast forward the show via pause content by using the media playback controls on your remote.
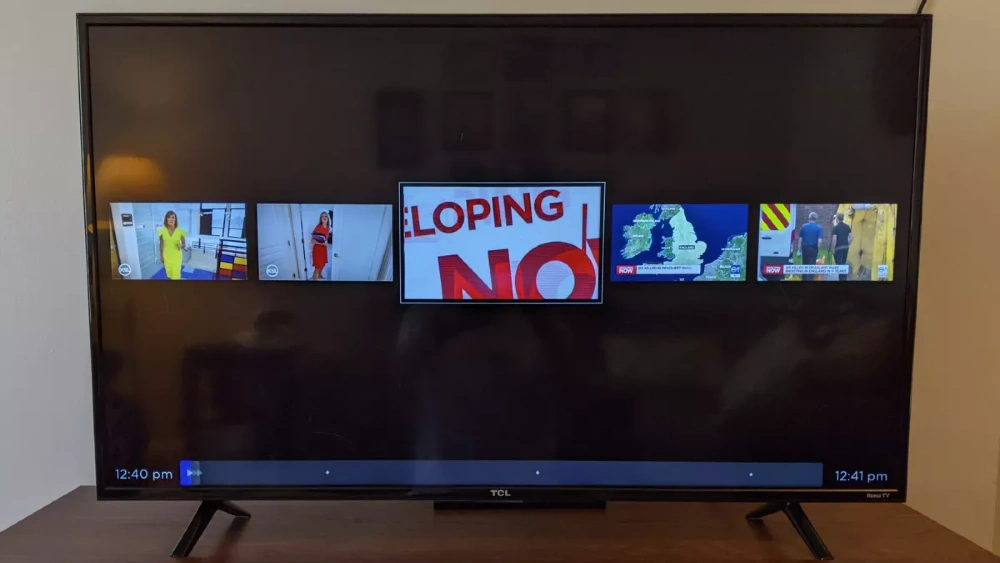
The 90 minutes of live shows get saved to your Drive but only as cache data to pause. You cannot access the saved video from your USB storage. You can skip ads by pausing a show.
To deactivate this feature, simply unplug your Drive from the connected port.
Conclusion
The only sad part is that you can activate live tv pause and rewind feature for only 90 minutes. No doubt, there are some limitations of time duration and drive size.
It’s still worth it as you can access this feature for free in almost all Roku TVs these days that come with a USB port. The cable and satellite companies charge a hefty amount for subscriptions.
You can rewind up to 90 minutes of any live show. Till that time, you go to enjoy your meals with a friend or family.
Don’t forget to take a backup of all files stored within your USB drives. You can upload all files again after unplugging from the Roku tv.